Example Asbestos Removal Projects in Kirkland

Every example follows one job from the lab test to the finished work: the building, what was sampled and found, how the removal is set up, the number of days and an approximate cost. Older Kirkland houses sit next to new ones, and a remodel can reach materials from before 1980, so each example starts with a test.

Two layers of sheet vinyl lifted before new kitchen tile

Example project
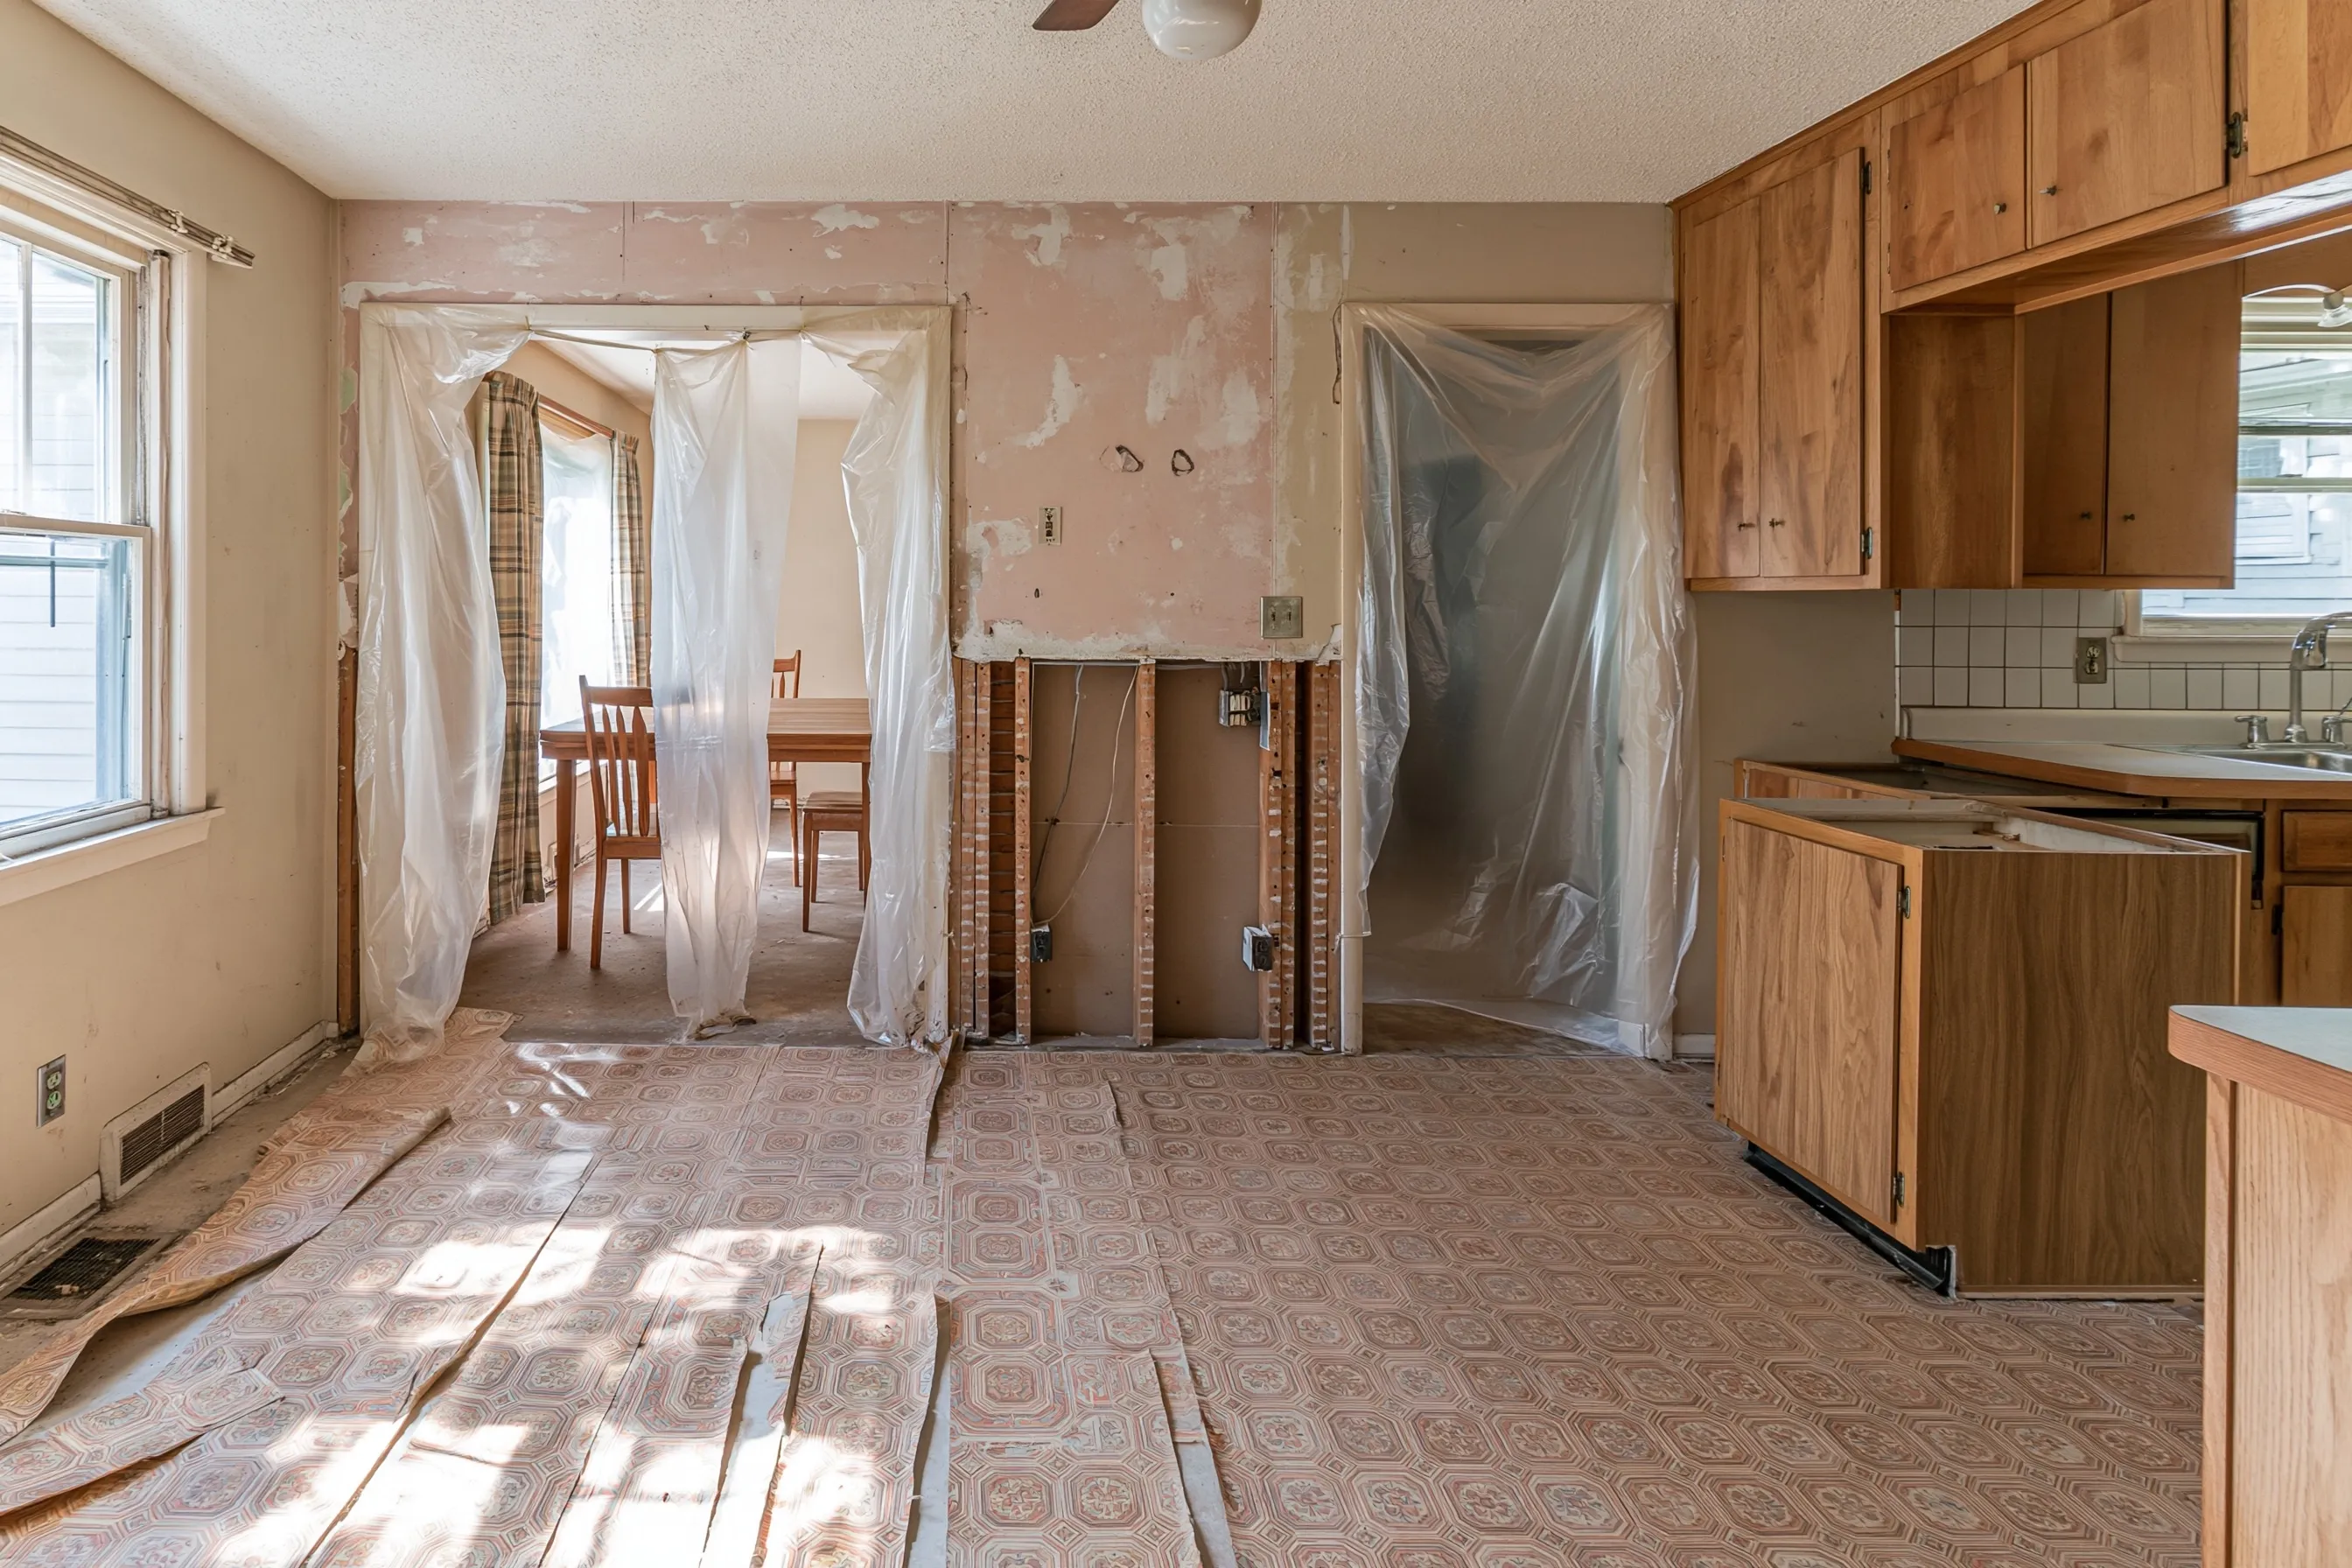
Half-demolished kitchen with patterned vinyl flooring cut away along one side, an open wall to the dining room and plastic on the doorways
Home
1960s single-story house in Kirkland, about 1,400 sq ft
Original request
New kitchen tile, set by a tile setter who will not tile over two layers of vinyl
Testing
The top vinyl, the older vinyl under it with its felt backing, and compound from the opened wall
Found
Asbestos in the felt backing of the older layer; the top vinyl and the wall are clear
Area
About 160 sq ft of kitchen floor, cut in strips along one side
Agency notice
Filed, since backing lifted from a floor this size is treated as friable
Timeline
Agency filing, a short wait for it, then two days in the kitchen
Cost
$3,000

Scope of work

Plastic over the doorways, the clear top vinyl cut and lifted first and bagged as ordinary waste, the older vinyl and its felt backing cut in strips and lifted wet, sealed bags, disposal and a HEPA clean of the plywood. New tile and finishing the wall opening stay with the owners and their contractor.

Project overview

In this example, the buyers of a 1960s house plan a new tile floor in the kitchen and have the wall to the dining room opened. The tile setter cuts a strip along one side and finds two layers of sheet vinyl, so the buyers ask for a test of each layer and of the wall.

The top vinyl is clear, but the felt backing of the older layer under it is positive, and the wall is clear. After the notice to Puget Sound Clean Air Agency, the top layer comes up first, then the older layer is lifted wet in strips, so the tile goes onto bare plywood.

The goal

The goal is a bare plywood kitchen floor ready for tile, with the older layer and its backing gone and a clear answer on the wall.

Process

  1. First visit Samples of both layers and the wall; the cut strip taped over.
  2. Before work Results by midweek, and the filing sent to the agency the same afternoon.
  3. Day one Plastic up, the clear top vinyl lifted and bagged on its own.
  4. Day two The older vinyl and backing lifted wet, bagged, and the room wiped down.

Planning right

  • A second layer is easy to miss. Check under the edge of a cut before the floor is priced.
  • Test each layer separately, because the top one can be clear while the one below is not.
  • A negative wall result means the wall work can go on as normal.
  • Keep the lab report. The tile setter may ask for it.

Get a free quoteMore about asbestos floor tile and mastic removal
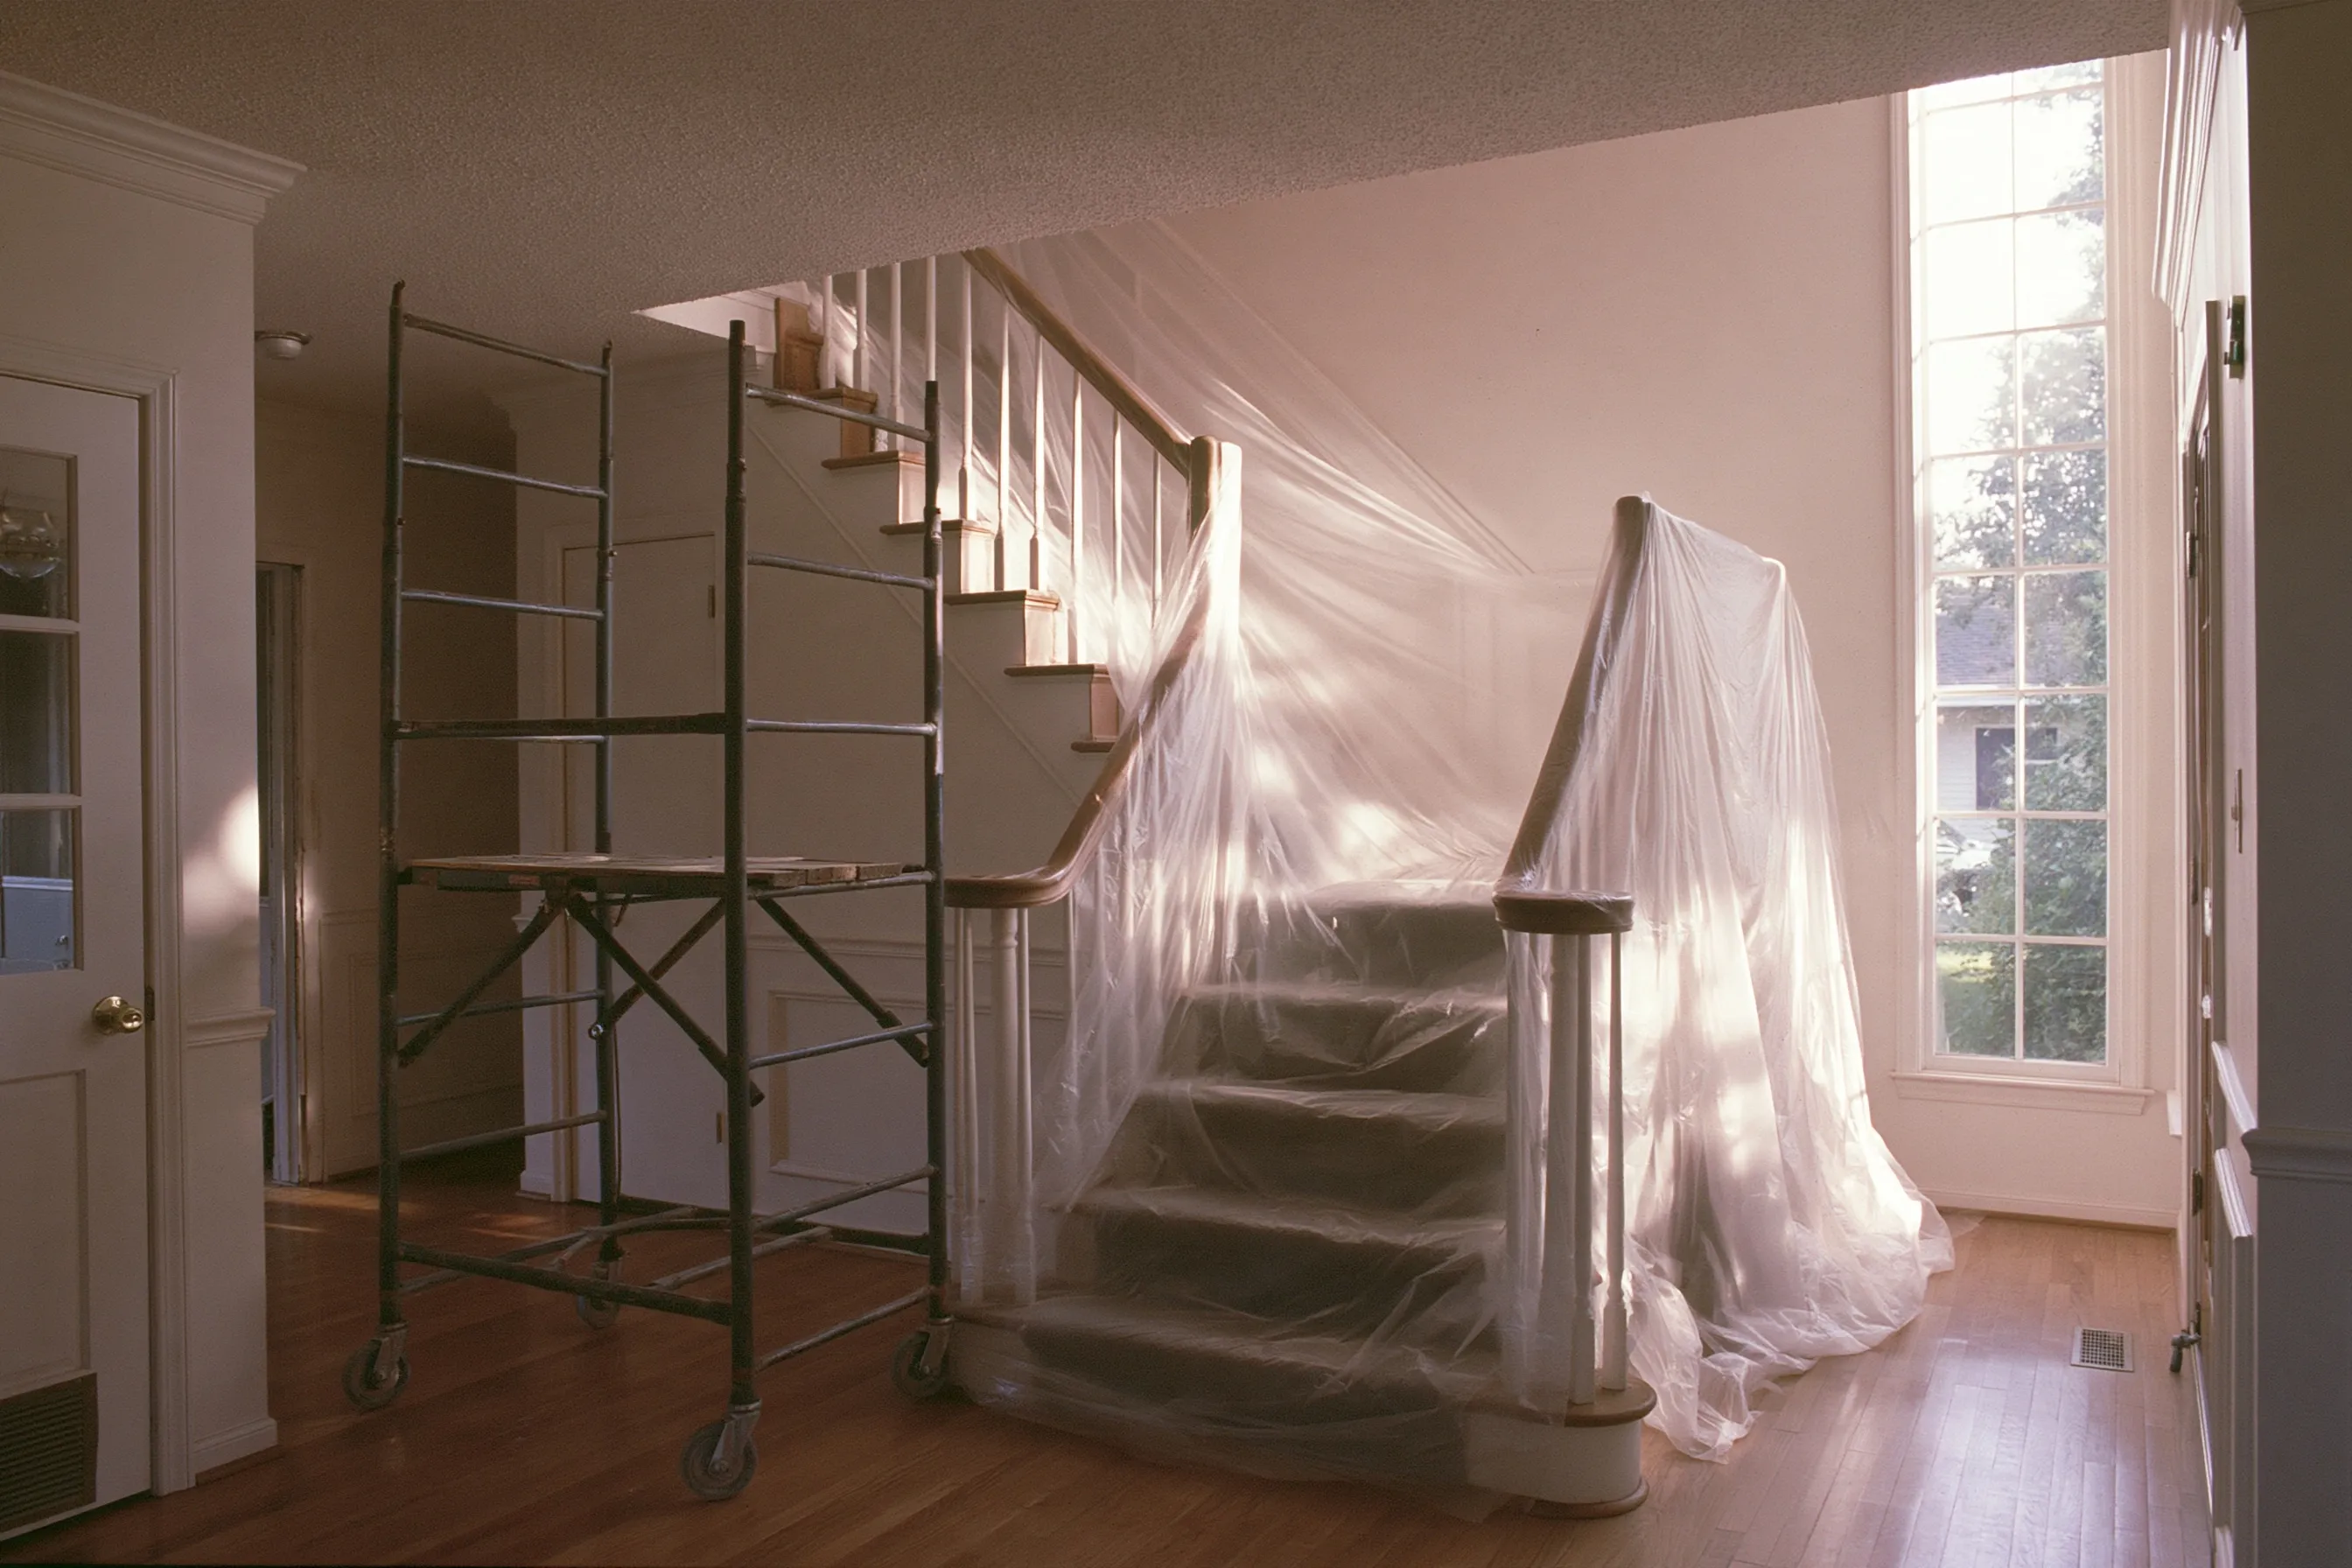
Popcorn ceiling off the upper stairwell before a skylight goes in

Example project

Two-story stair hall with a bumpy white ceiling far overhead, scaffolding on wheels beside the stair and sheeting over the treads and rail
Home
Late-1970s two-story house in Duvall
Original request
A skylight cut into the ceiling over the stairs
Testing
Texture from the skylight end and from the low end, sampled separately
Found
Asbestos at the skylight end; the low end was redone later and is clear
Area
The whole stairwell ceiling is about 200 sq ft, rising to 17 ft; about 100 sq ft at the skylight end comes off
Setup
Treads and rail sheeted, a wheeled scaffold beside the stair
Timeline
Agency filing first, one scraping day, then the skylight crew
Cost
$3,000

Scope of work

Plastic on the stairs, walls and rails, a rolling scaffold, the texture at the skylight end misted and scraped into sealed bags, the treads vacuumed and damp-wiped, and disposal. The clear low end stays. Skylight framing, drywall patching and paint belong to the skylight installer and painter.

Project overview

In this example, the owners of a late-1970s house in Duvall want a skylight over the dark stairwell. Cutting the opening would break through the textured ceiling, so the texture is tested at both ends. The skylight end has asbestos in it, and the low end, redone in a later repair, does not.

Only the skylight end, about 100 sq ft, is scraped, from a rolling scaffold, after the notice to Puget Sound Clean Air Agency. The low end can stay and be skimmed over with the rest. The skylight installer then cuts into a bare ceiling.

The goal

The goal is a bare ceiling at the skylight end, with no asbestos texture left around the new opening.

Process

  1. Before work Texture sampled at both ends; notice filed; the skylight spot marked on the ceiling.
  2. Day one Stairs covered, scaffold set up, texture scraped from the high end down and bagged.
  3. Day two Bags sealed, stairs and landing cleaned, plastic down.
  4. Then Framing for the skylight, then a skim coat over the whole stair ceiling.

Planning right

  • Any new opening in a textured ceiling is a reason to test it, even a small one.
  • Ask the skylight installer to wait until the texture is off and the stairs are clean.
  • A skim coat over the whole ceiling hides the line where the texture stops.
  • Keep the stairs clear of rugs and runners before the plastic goes down.

Get a free quoteMore about asbestos popcorn ceiling removal

Wrapped ducts in a crawl space before new water pipes

Example project

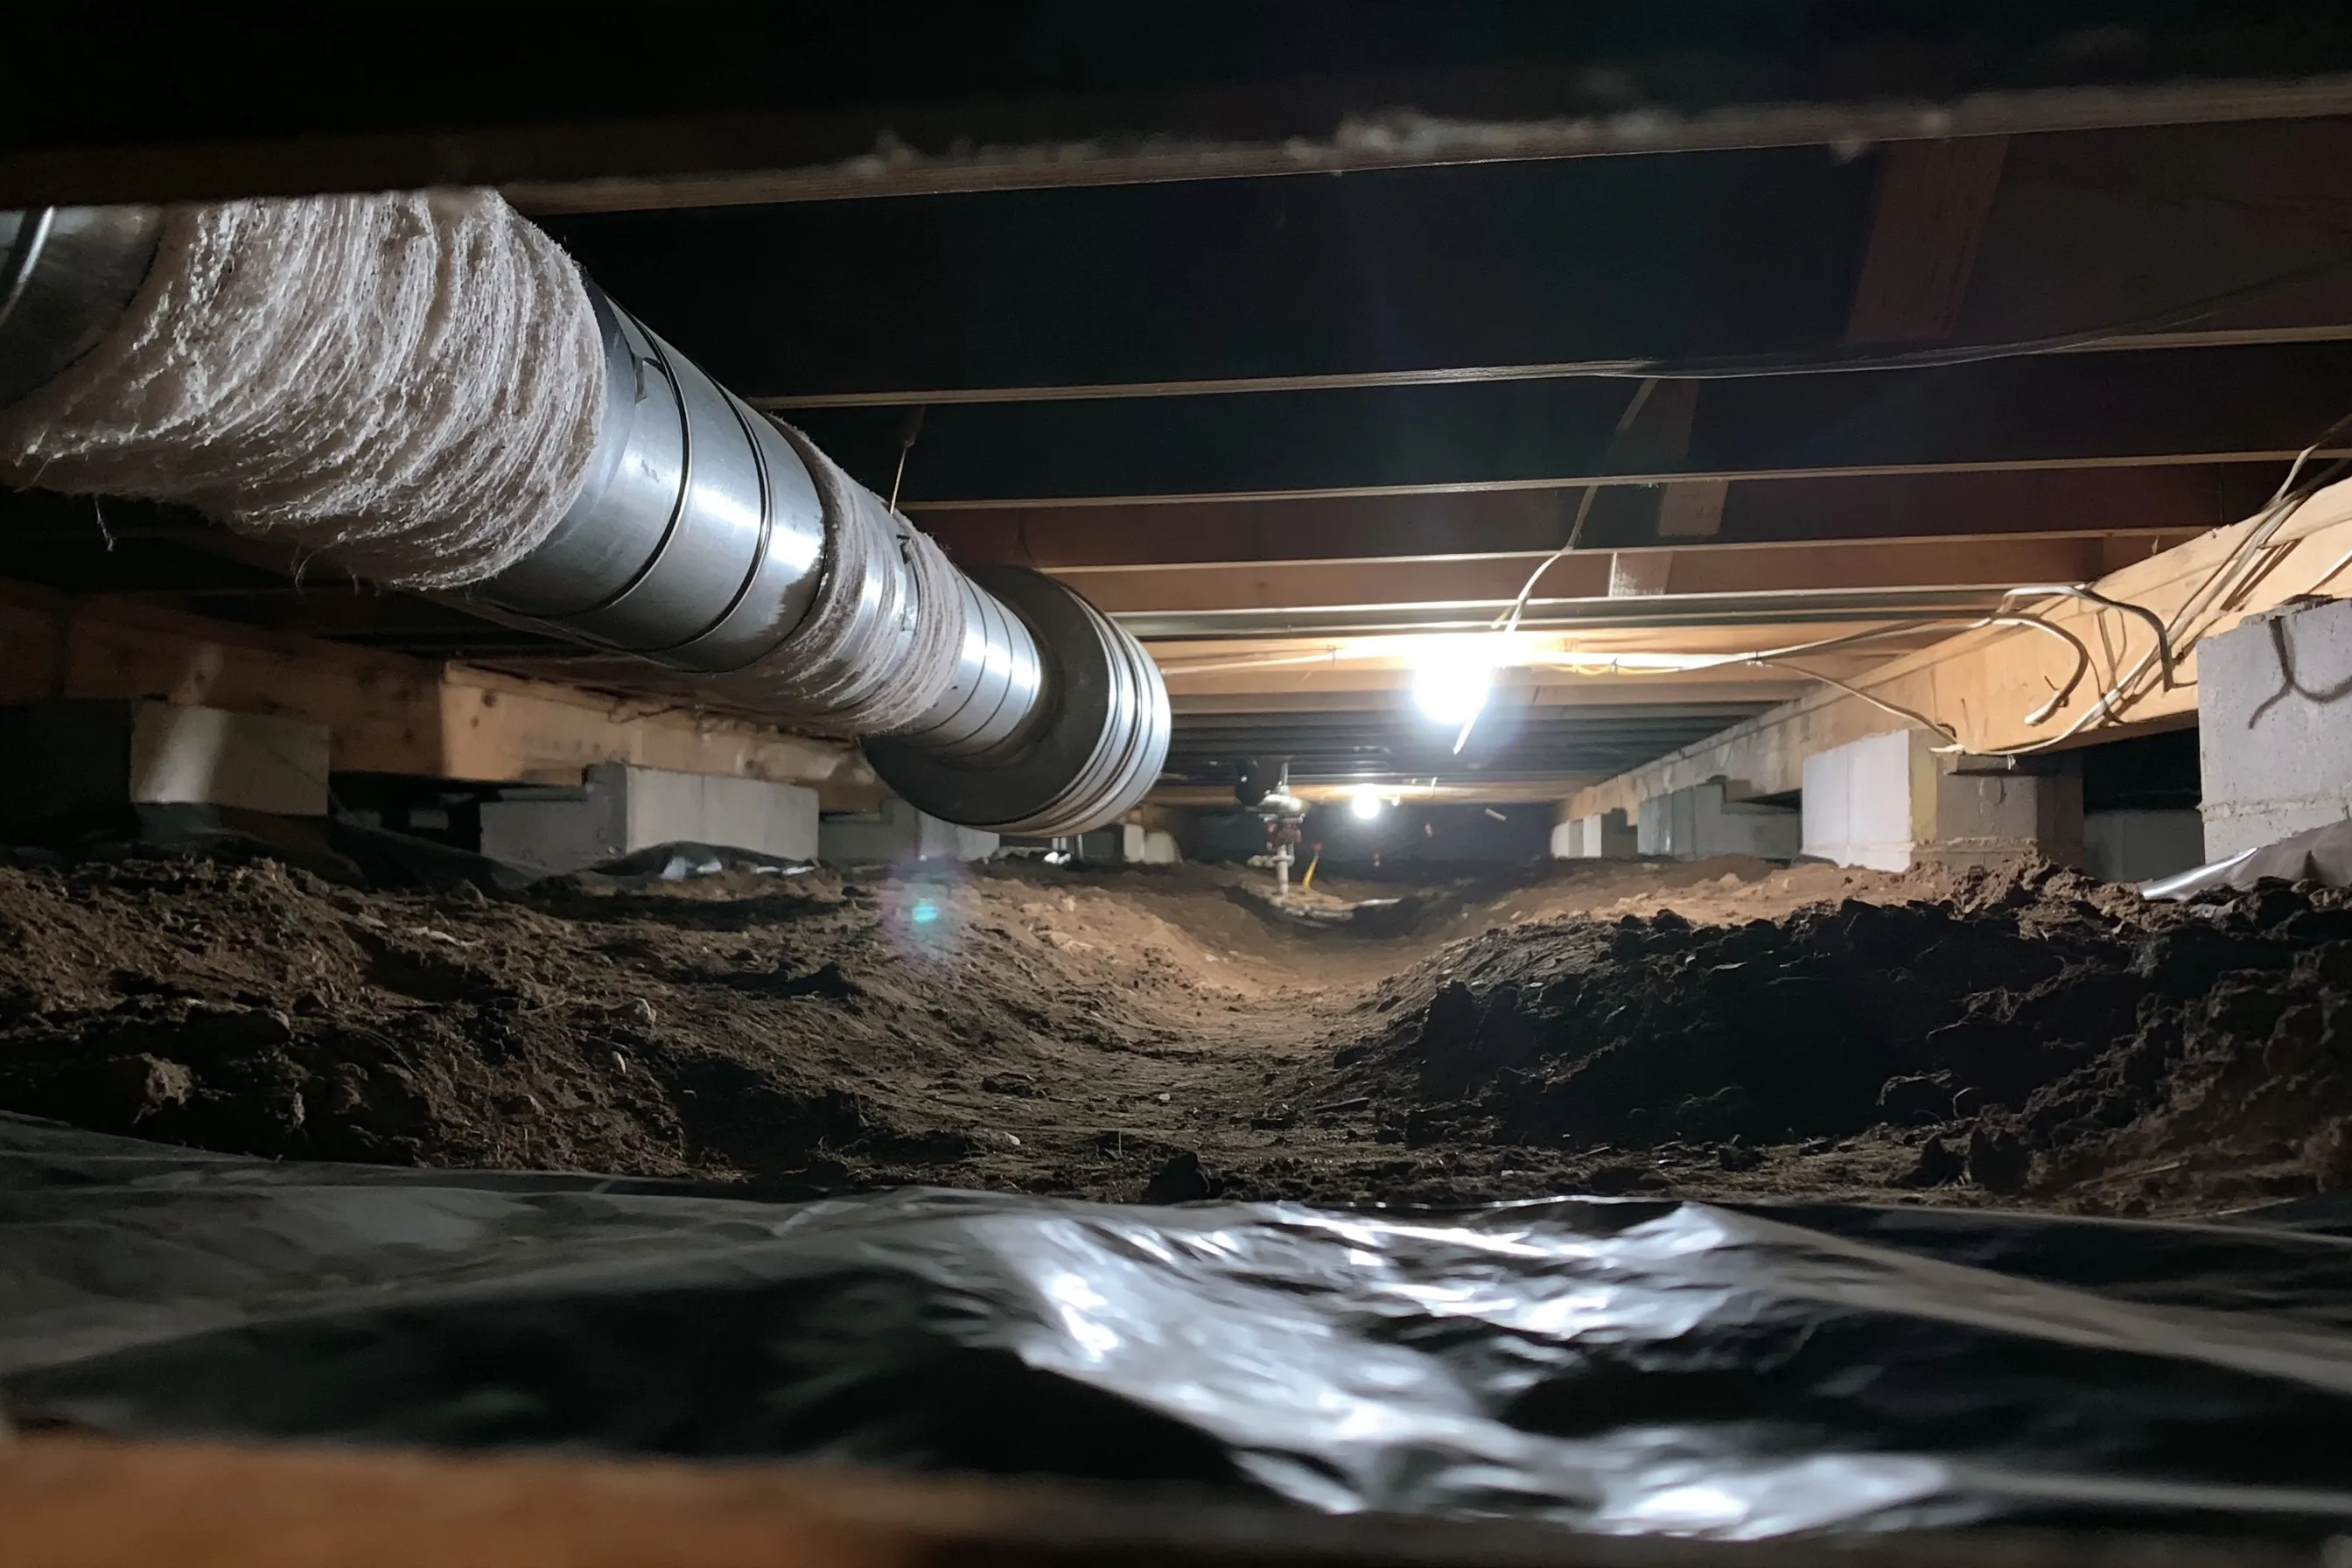
Tight crawl space under a house, round metal ducts bound in frayed white wrapping running above black plastic sheeting
Home
1950s single-story house in Kirkland over a crawl space
Original request
New water pipes run through the crawl space
Testing
A frayed piece of the duct wrapping near the hatch, positive
Material
About 70 ft of wrapped duct along the plumber’s route; the rest left in place
Agency notice
Needed, since 70 ft of duct carries about 150 sq ft of wrap, well over the 48 sq ft mark
Timeline
Two days under the house before the plumber starts
Cost
$2,600

Scope of work

A work area sealed under negative air in the crawl space, the wrap taken off wet along the route, cut ends sealed, the vapor barrier HEPA vacuumed where the work ran, sealed bags, disposal and an air test. The plumber’s repipe and new wrap on the bare ducts are quoted by those trades.

Project overview

In this example, a 1950s house in Kirkland is getting all new water pipes. The plumber has to crawl along the heating ducts, which are wrapped in old white tape-like insulation, worn in places. A lab test shows asbestos, so the plumber waits.

The wrap comes off only where the new pipes run, about 70 ft of duct, and the cut ends of the rest are sealed. That is roughly 150 sq ft of wrap, three times the 48 sq ft threshold, so the agency is notified before anyone goes under the floor. The ducts keep working; the new insulation goes on after the plumber.

The goal

The goal is a clear path for the plumber, with the wrap gone where the work runs and the rest sealed.

Process

  1. Before work Wrap sampled; notice filed; the plumber marks the pipe route.
  2. Day one Crawl-space access sealed, filtered air unit running, wrap wetted and removed.
  3. Day two Cut ends sealed, the vapor barrier vacuumed along the route, air test.
  4. Then The plumber runs the new pipes and the ducts get new insulation.

Planning right

  • Crawl-space access is often a hatch in a closet. Clear the closet before the crew arrives.
  • Worn duct wrap is a reason to keep pets and storage out of the crawl space.
  • Ask whether the remaining wrap can stay. Sealed and intact, it can.
  • Plan new duct insulation with the heating contractor for the same week.

Get a free quoteMore about asbestos insulation removal

Cement shingles off a rambler before a second story is added

Example project

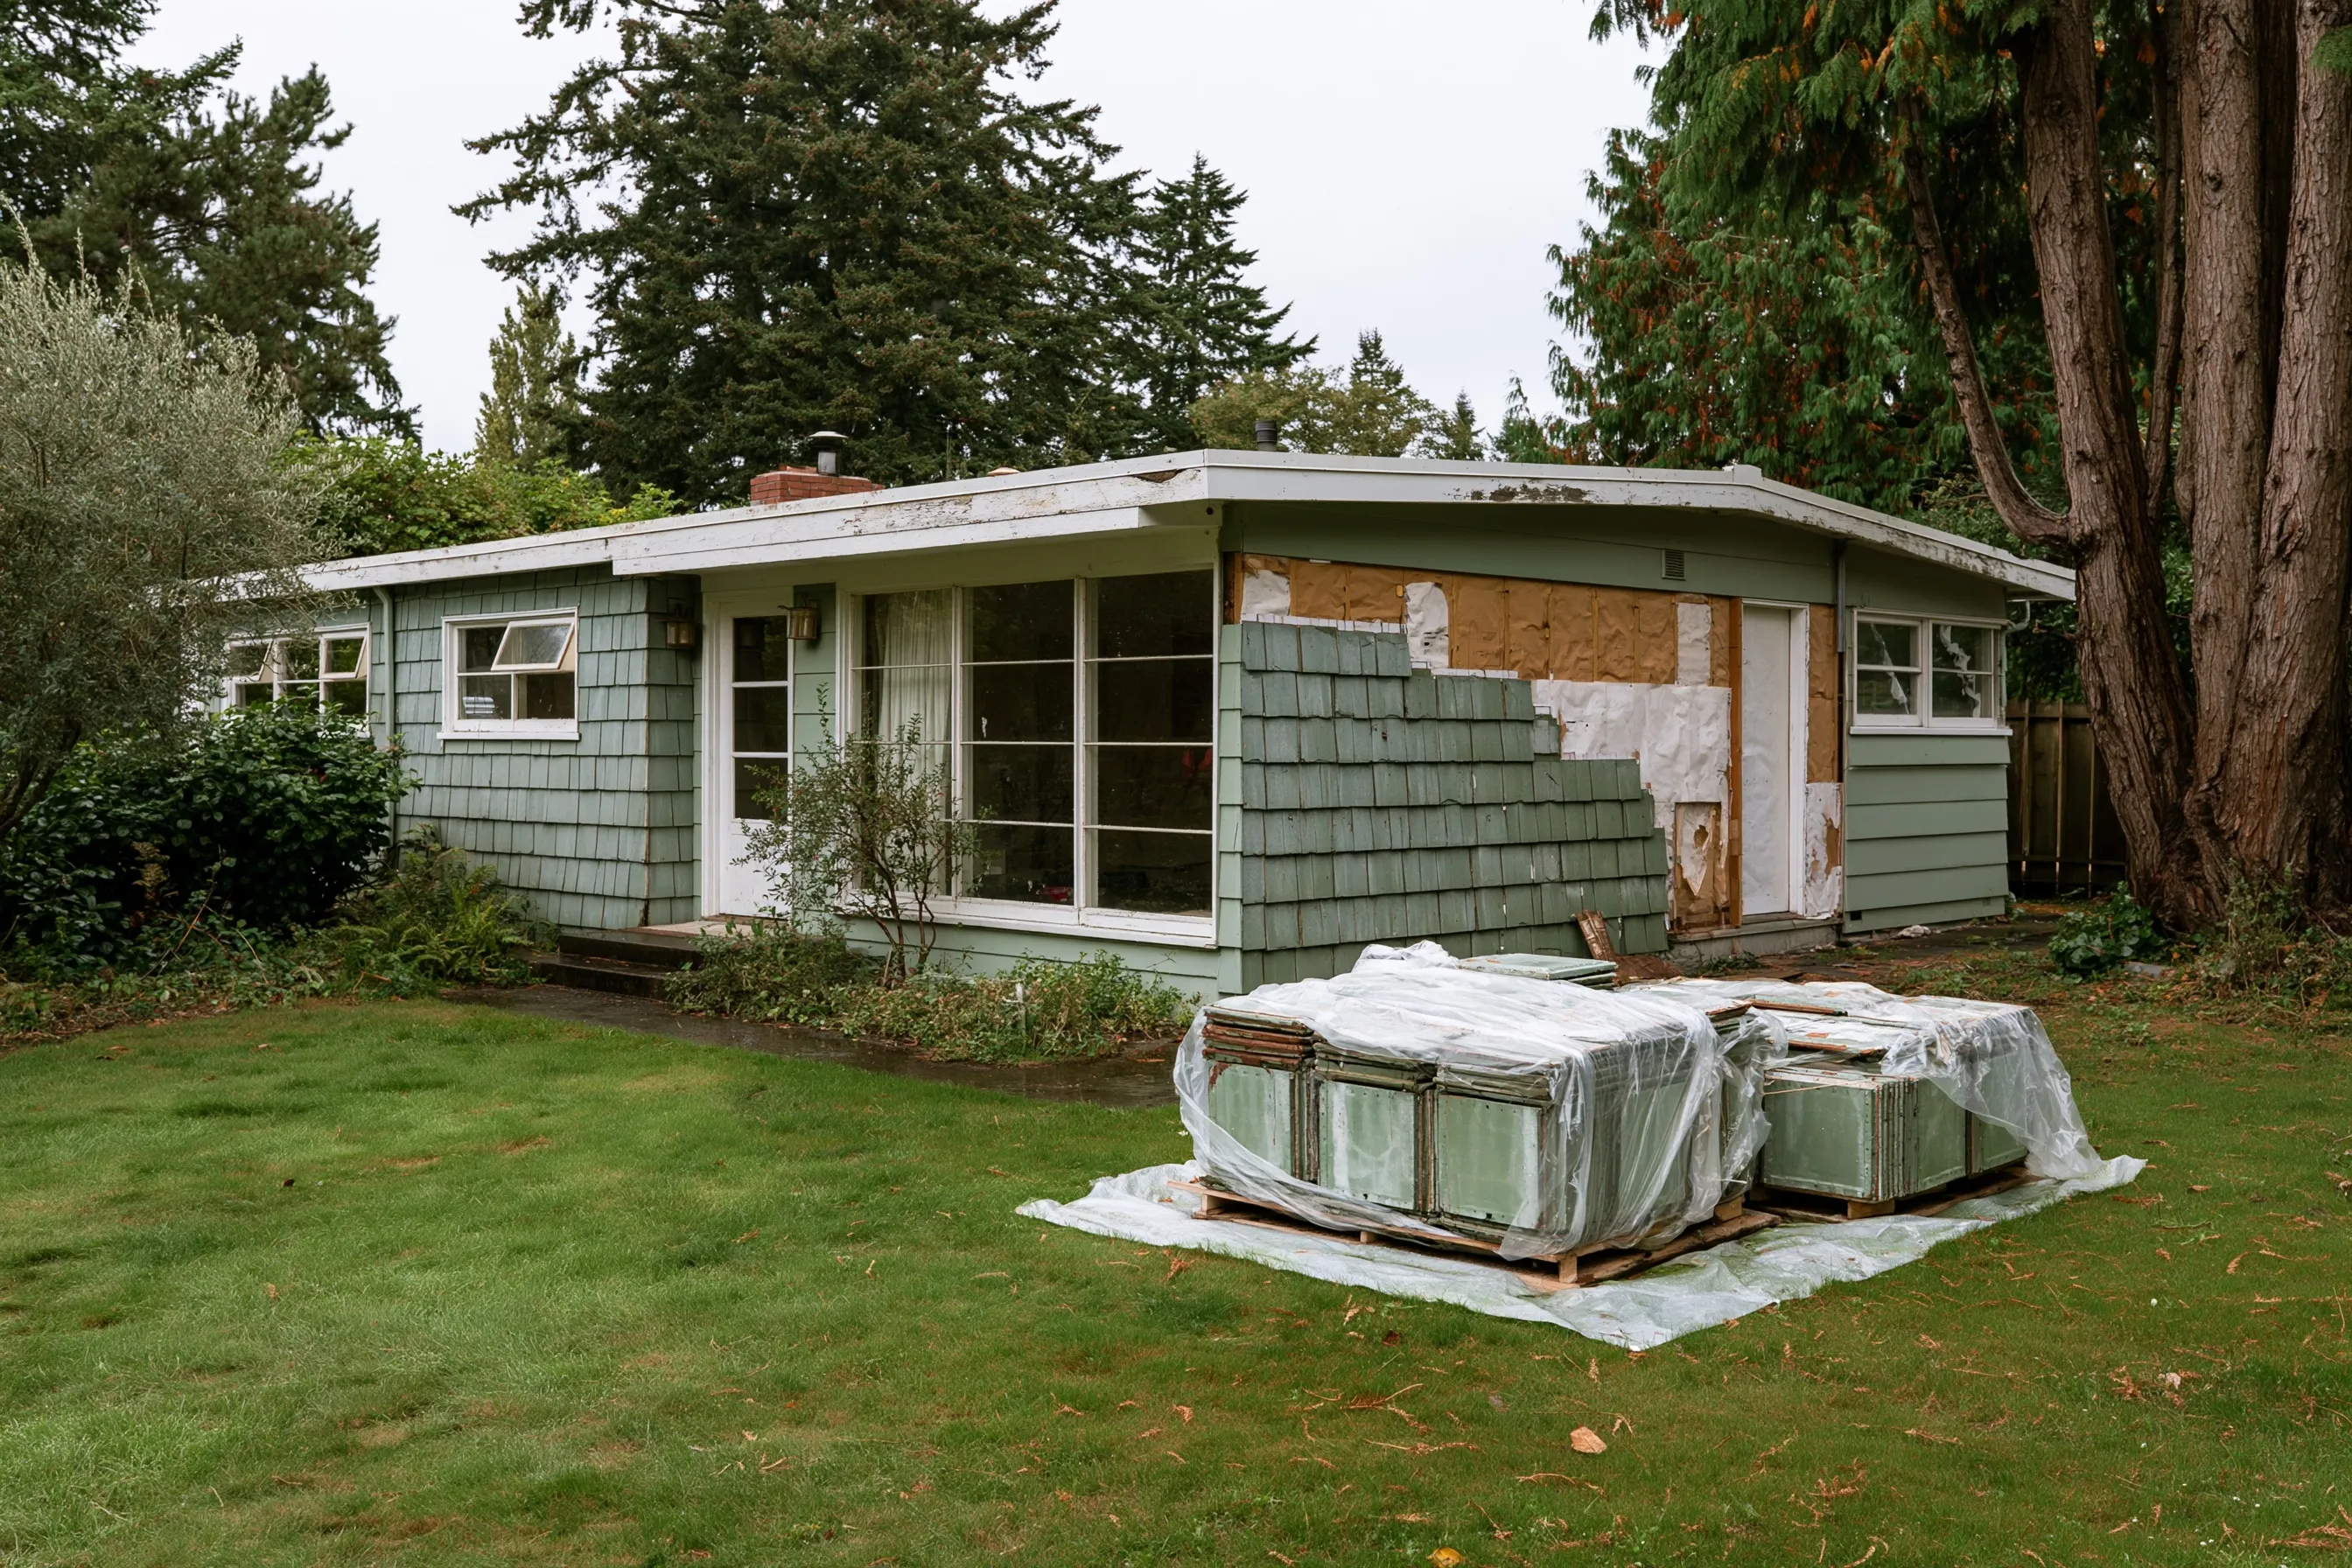
Low 1950s house sided in green-gray cement shingles, with one wall partly bare and wrapped bundles of shingles on the lawn
Home
1950s rambler in Kirkland with gray-green cement shingles
Original request
A second story and new siding on the whole house
Testing
A corner shingle by the driveway sent out, positive
Area
About 1,300 sq ft of wall
Agency notice
Clean air agency told ahead of the strip
Timeline
Four days of removal, a wall at a time, before the framers arrive
Cost
$15,000

Scope of work

Plastic along every wall, each shingle sprayed down and lifted off once its nails are out, the day’s stack wrapped before dark, disposal, and the yard searched by hand for chips. The framer, roofer and siding crew bid their own work.

Project overview

In this example, the owners of a 1950s rambler in Kirkland are adding a second story. The framers will tie new walls into the old ones, and the whole house gets new siding at the end, so every cement shingle has to come off. The sample from the corner by the driveway is positive.

Because the agency treats these shingles as friable, the filing is made before the strip starts. The crew works one wall at a time, keeps the shingles wet and wraps them on plastic. The framers start on bare walls.

The goal

The goal is a rambler with bare walls, every shingle off whole, ready for the framers to add a second story.

Process

  1. Before work Shingle sample to the lab; notice filed; framing start set for the week after.
  2. Days one to three Shingles wetted and pulled off whole, wall by wall, wrapped each evening.
  3. Day four Last wall done, stacks hauled, the ground checked for pieces.
  4. Then The framers open the roof and build the second story.

Planning right

  • Strip the siding before the roof comes off, so no shingles get broken by falling material.
  • Ask for the stacks to leave the site the same week. Framers need the yard.
  • Bare sheathing should be wrapped quickly if rain is coming.
  • If the old roof turns out to be cement shingles too, plan a separate roof survey before the framers start.

Get a free quoteMore about asbestos siding and roofing removal

Old floor tile out of a shop unit before a fitness studio

Example project

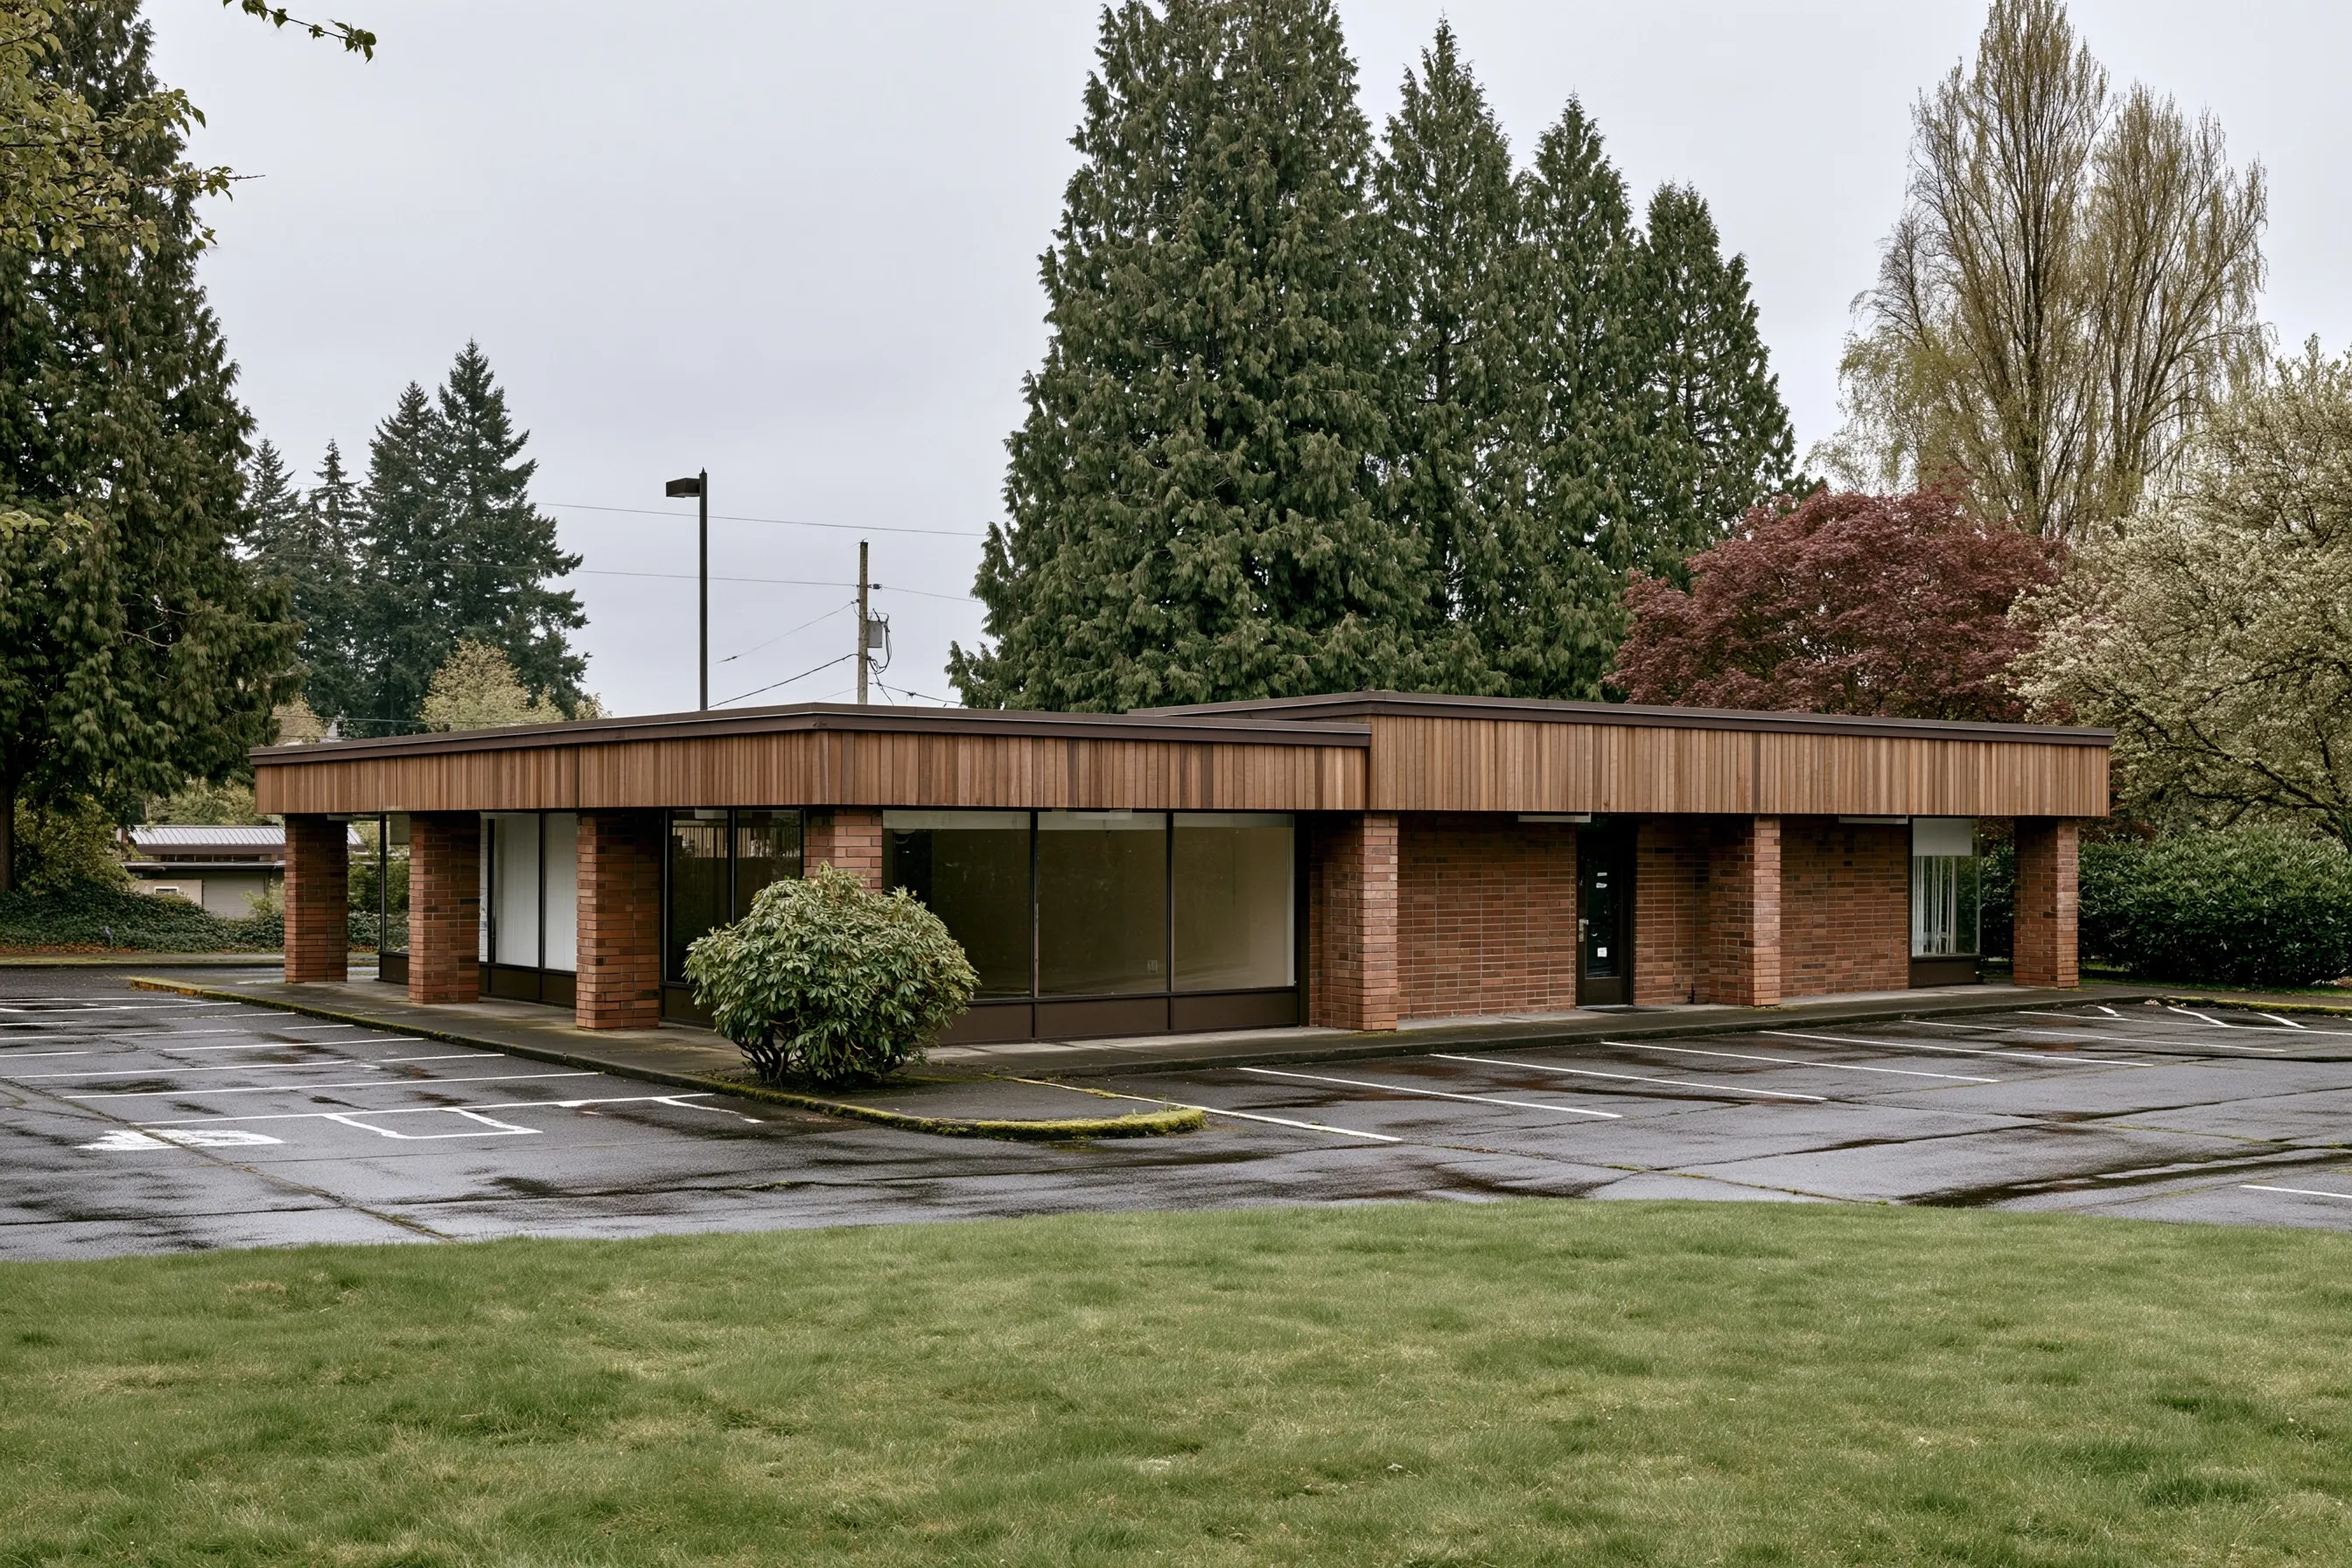
Low brick and timber shopping strip from the 1960s on a cloudy day, one of its units vacant
Building
1960s single-story brick and wood retail building in Woodinville
Original request
Rubber flooring glued to the slab for a fitness studio
Testing
Inspector’s survey of the vacant unit: tile and glue both positive
Area
About 900 sq ft of floor
Setup
A sealed work area with a plastic door, kept apart from the open shops next door
Timeline
Survey report, then three working days on the floor
Cost
$10,500

Scope of work

A sealed work area with its own entry, a filtered air unit, the tile lifted wet and whole, the adhesive taken off with a wet scraper, sealed bags, disposal, a HEPA clean and an air test before the unit is handed over. The inspector’s fee and the rubber floor are on separate invoices.

Project overview

In this example, a fitness studio is moving into an empty unit in a 1960s retail building in Woodinville. The rubber flooring has to be glued straight to the concrete, so the old floor tile and the black adhesive under it must come off. The survey finds asbestos in both.

The shops on either side stay open, so the unit is sealed with its own plastic door and filtered air. Each tile is soaked and lifted in one piece, and the glue comes off with wet hand scrapers. The contractor confirms with Puget Sound Clean Air Agency whether a notice is needed before work starts.

The goal

The goal is a bare, clean slab ready for the studio floor, with the shops next door undisturbed.

Process

  1. Week one The inspector samples the vacant unit; results follow a few days later.
  2. Before work Neighbors told the dates; the contractor checks the notice with the agency.
  3. Days one and two Studio space closed off, every tile soaked and lifted, glue worked off the concrete.
  4. Day three HEPA clean, air test, the unit handed to the flooring installer.

Planning right

  • Rubber and epoxy floors need a bare slab, so covering the old tile is not an option.
  • Do not let anyone grind the slab until the adhesive is off and tested gone.
  • Shared ceiling spaces can carry dust next door. Ask how the top of the work area is sealed.
  • File the air test result with the lease so the landlord has it later.

Get a free quoteMore about commercial asbestos abatement

Survey and removal before a bathroom remodel goes out to bid

Example project

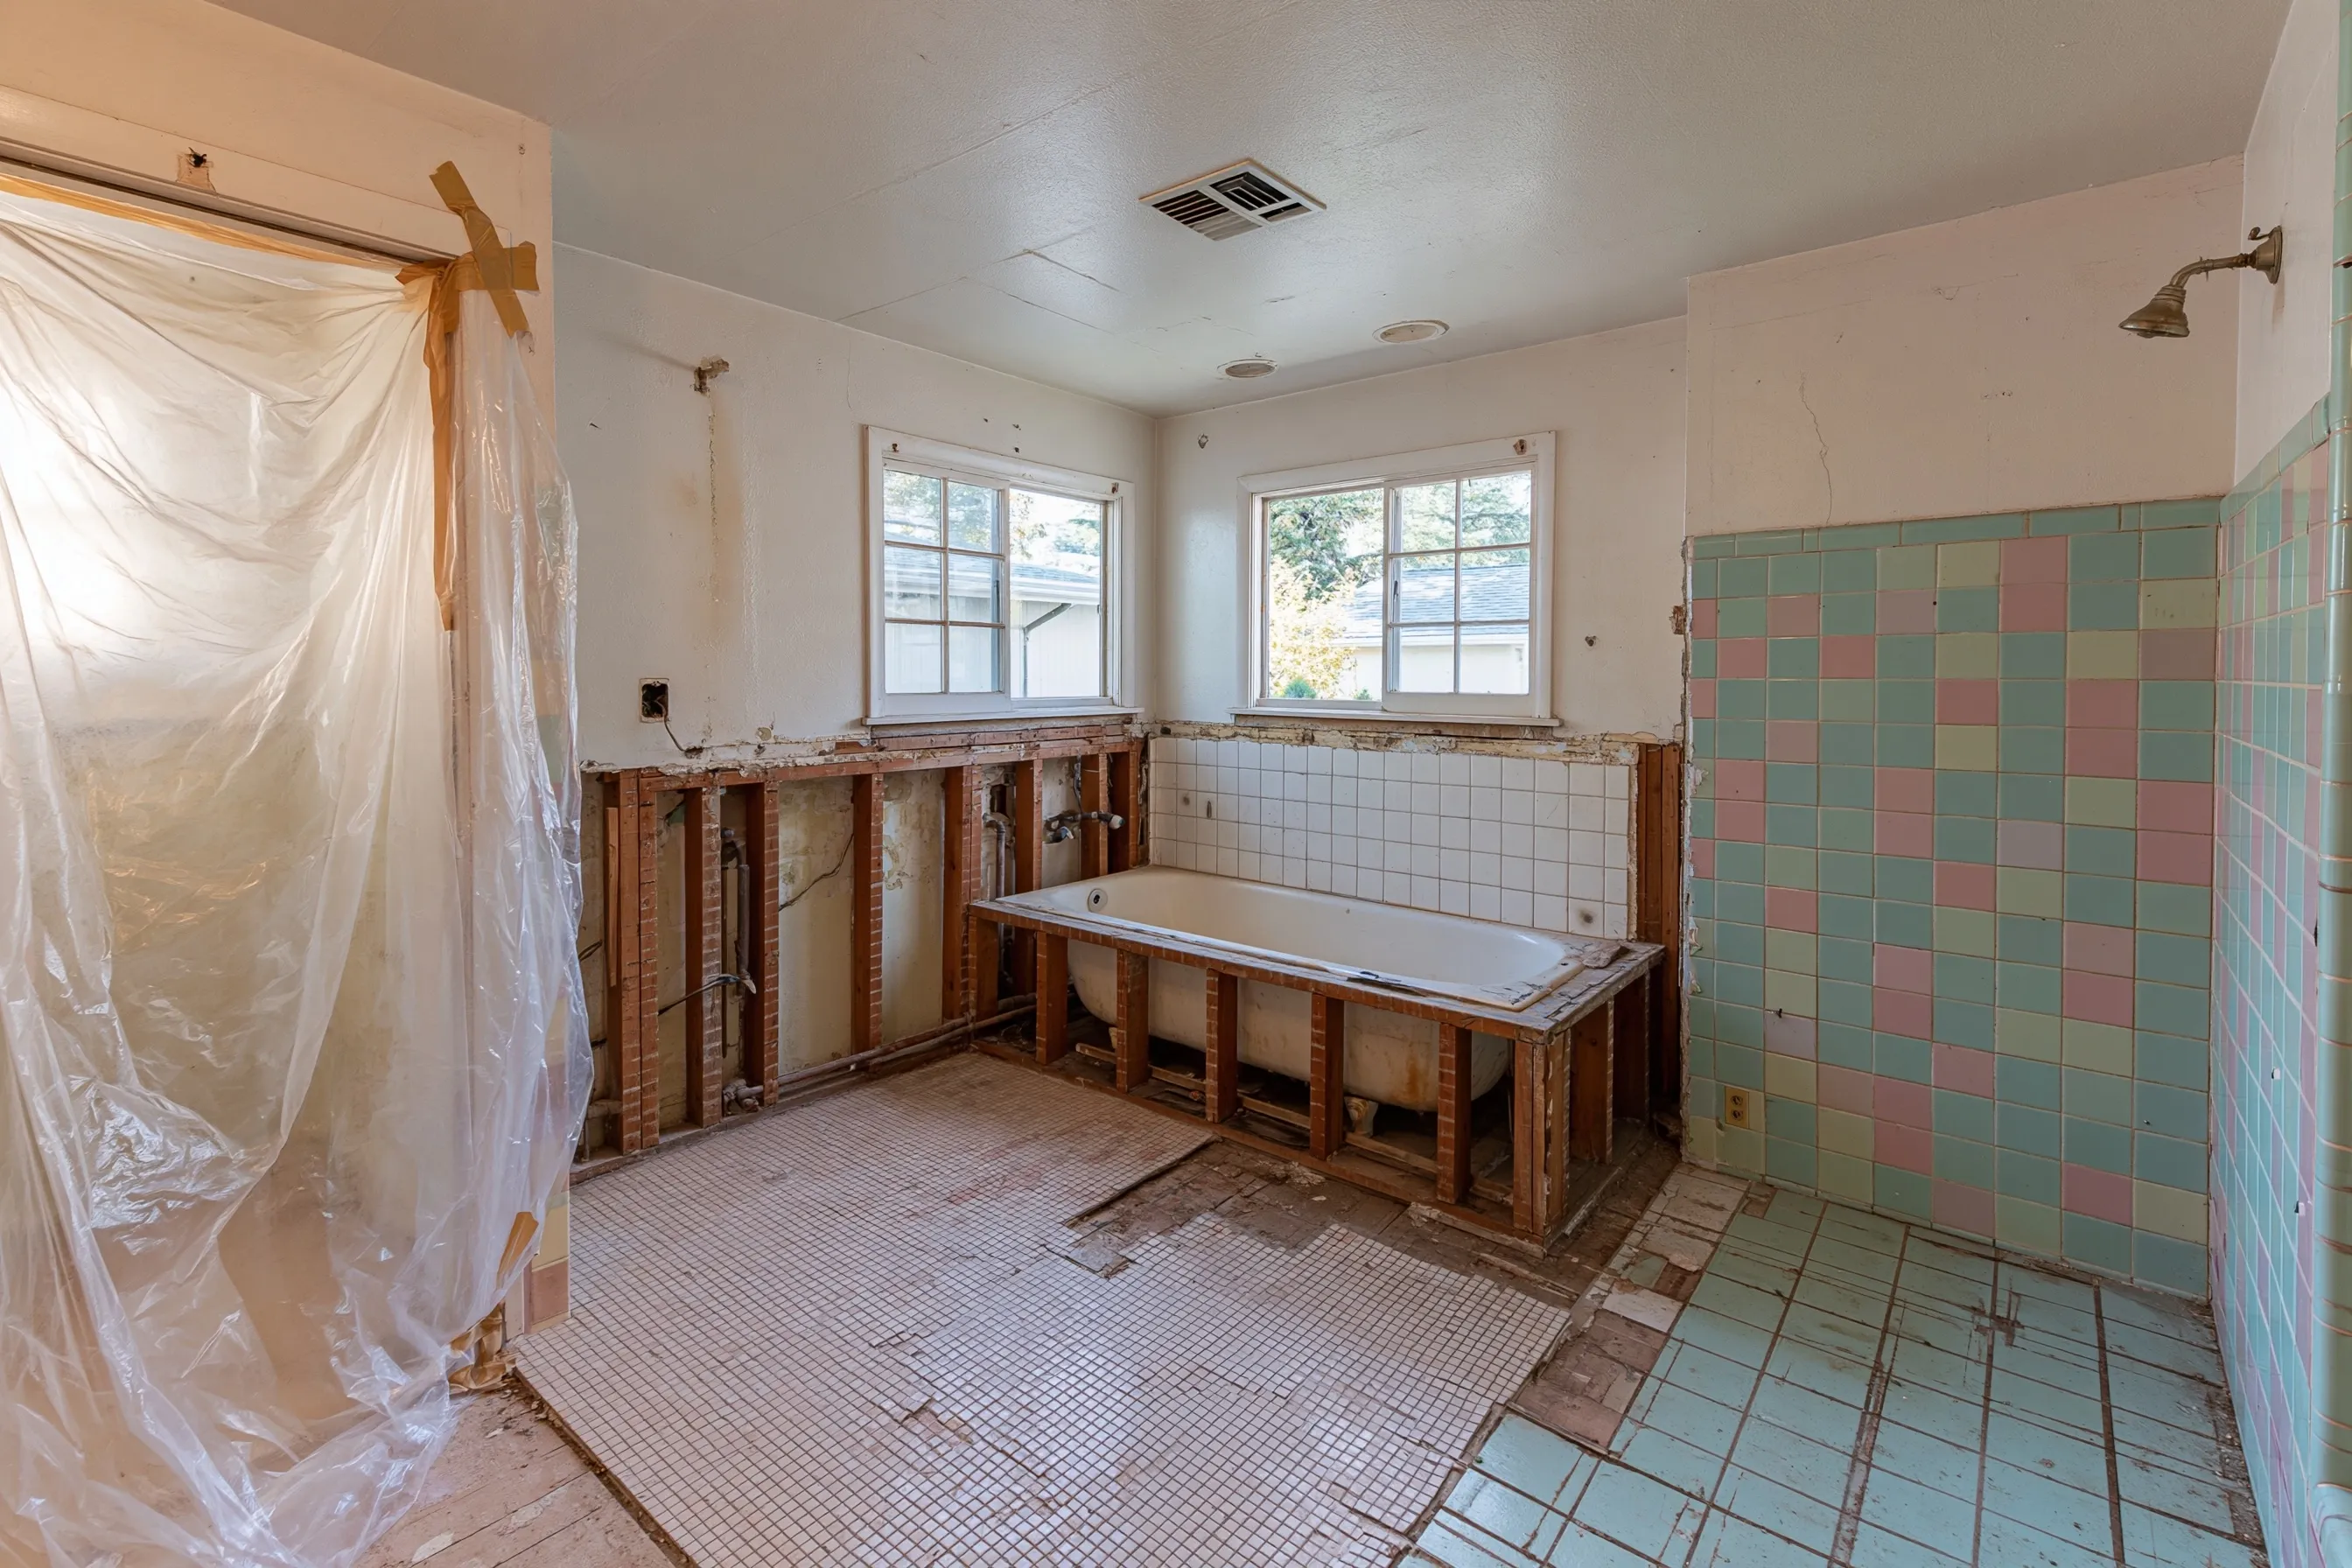
1950s bathroom opened for a remodel, with the tub-surround wall cut out, floor tile lifted and plastic sheeting up
Home
1950s single-story house in Kirkland
Original request
A new hall bathroom, with bids from three remodelers
Testing
Floor tile, its glue, wall texture and tub-wall compound sampled before any remodeler visits
Found
Two positives: the black glue under the small floor tile and the seams of the tub wall
Work
About 45 sq ft of floor and 70 sq ft of tub wall removed inside plastic
Timeline
Survey a week ahead of the bids; removal in two days
Cost
$4,200

Scope of work

Plastic over the doorway and the hall, the floor tile lifted wet with its adhesive, the tub-surround wall cut out in sheets inside the enclosure, sealed bags, disposal, a HEPA clean and a final check. The inspector’s fee and the winning remodeler’s contract are billed on their own.

Project overview

In this example, the owners of a 1950s house want three remodelers to bid on a new hall bathroom. They have the survey done first, so every bid starts from the same facts: asbestos in the glue under the small floor tile and in the joint compound around the tub, none in the wall texture.

With the report in hand, the remodelers can price the job without guessing. The two positive materials come out in two days under plastic, and the chosen remodeler starts on a stripped room.

The goal

The goal is fair, comparable bids and a stripped bathroom, with the two positive materials gone before the remodeler starts.

Process

  1. Two weeks ahead Survey visit and samples; written report to the owners.
  2. Bid week The report goes to all three remodelers with the drawings.
  3. Days one and two Floor tile and the tub wall removed under plastic, waste bagged.
  4. Then The remodeler takes out the tub and starts the new bathroom.

Planning right

  • Bids written without a survey have to guess at what is behind the finishes.
  • Ask each remodeler whether the asbestos removal is inside or outside their price.
  • The survey should cover every surface the drawings show being cut, including behind the tub.
  • The tub can stay in place while its surround wall is cut out.

Get a free quoteMore about asbestos removal before a remodel or tear-down

Request a free asbestos removal quote

We recommend calling, but do feel free to contact us using this form. We'll get back to you with a free, personalized quote or additional questions as soon as possible. We're here to help.

Call (425) 553-2535

Call (425) 553-2535